Applies to: HR/Customer Administrators
The Joiner wizard makes adding an employee to MyPeople quick and easy, whilst capturing the information that is need by both the business and employee.
- To add an employee to MyPeople and your organisation, logged in as an administrator click the Joiner – Link to joiner wizard dashboard panel.


- The joiner wizard will be displayed.
Personal Details
- Starting on the Personal Details tab, enter the personal information for your new employee.


- Within the wizard, some fields will either be drop-down selection fields, free text fields or date/calendar style fields.
- Starting with Title, this is a drop-down field to choose the title of your new employee.
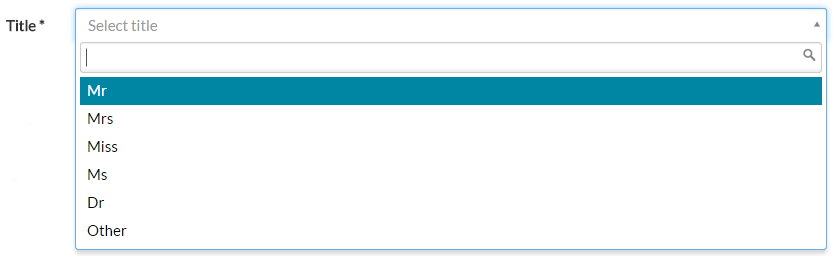

- Some drop-down fields are quite lengthy in the number of results they could return.
- In the search field for a drop-down menu, you could choose to start typing the first few letters on the particular result you wish to select.
- On the Nationality drop-down menu for example, tying ‘br’ as shown below, will result in only showing those returned values that meet your search criteria.


- First, middle and last names are free text fields. Type the names of your new employee.


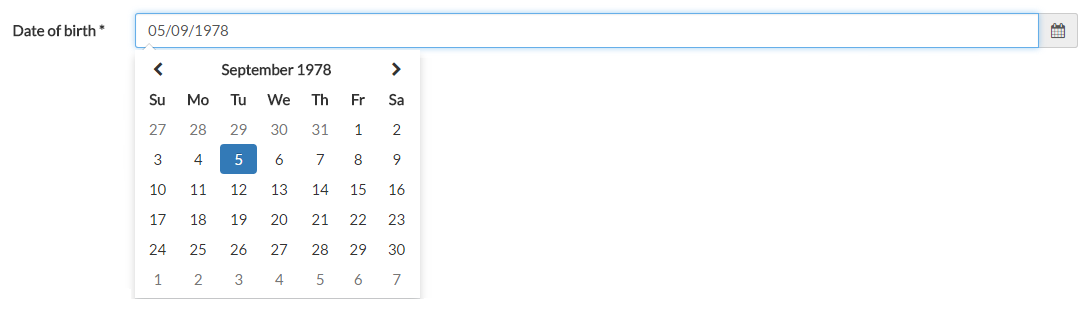
- Date of Birth is a date/calendar style field. You can either type the date manually in DD/MM/YYYY format, or select it from the calendar by clicking on the calendar icon at the end of the field.

- One you have entered all of the employee personal details, paying close attention to those fields marked with an asterisk (required fields), click next to move on to the Contact Details tab.
Contact Details
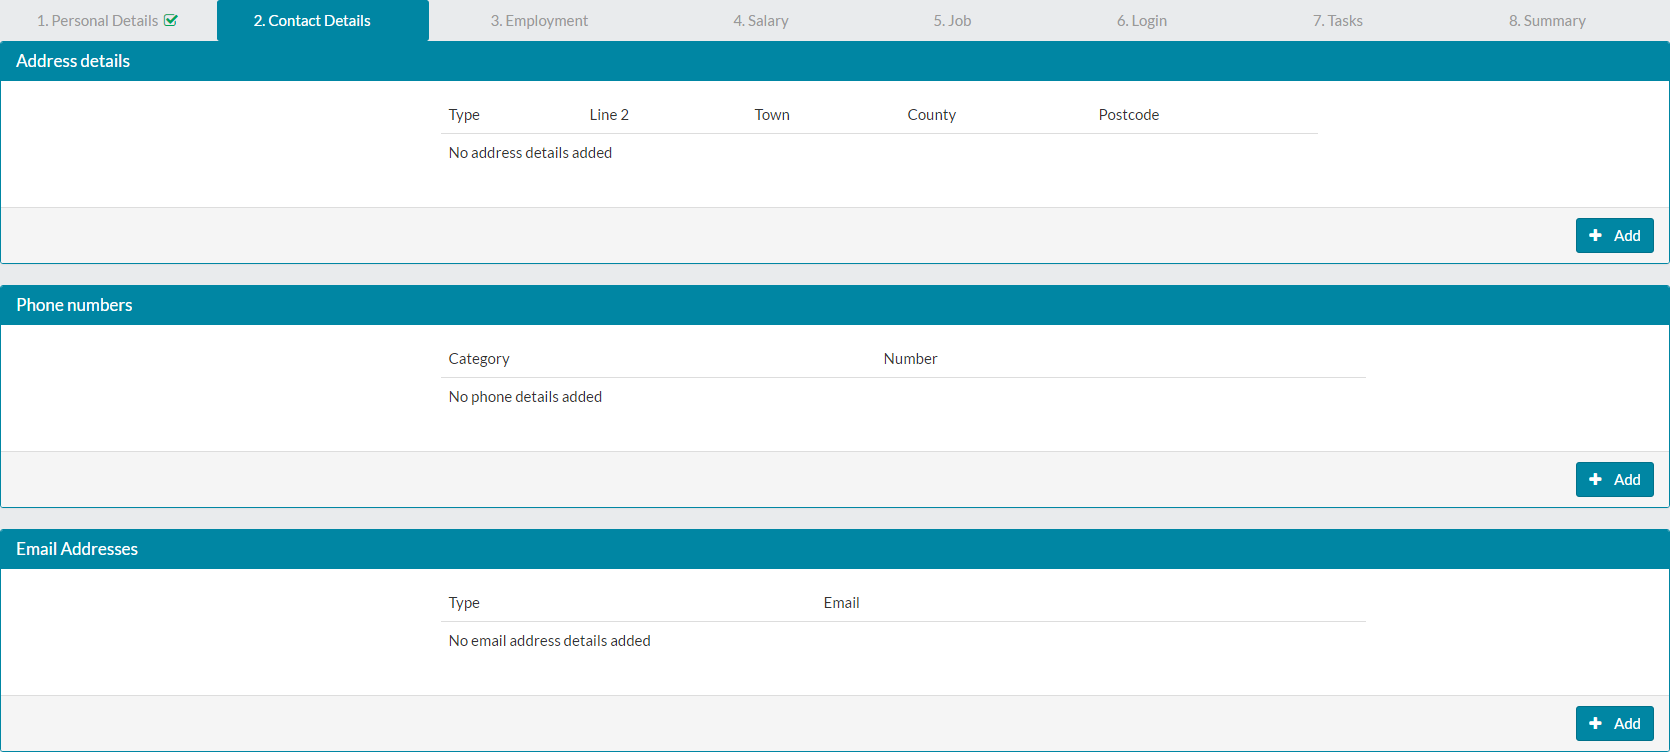
- Under the Contact Details tab, you can enter address, email and telephone number details, which could be either business or personal details.

- Clicking add under the address details section, will display the Address Details form, whereby you can select the type of address, before entering the address information.

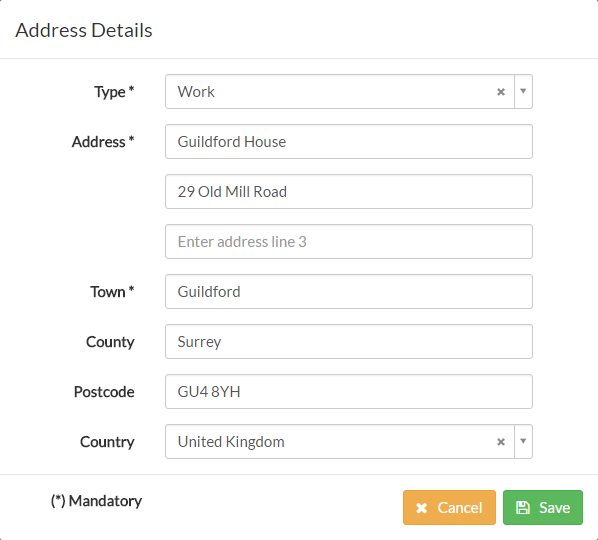
- Once the type has been selected, as well as details entered, click save to add this address to the contact details section.
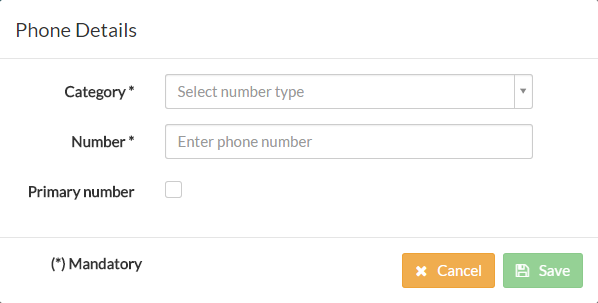
- Clicking add on both the telephone numbers and email addresses sections, displays a form similar to the below.

- Adding an email address displays a similar form.
- On both the telephone and email address forms, you’ll see an option to make the number/email address as primary. This is used for reference if multiple addresses are shown.
- Once you’ve added addresses, telephone numbers and/or email addresses, the contact details tab will look similar to the following.


- Add any additional details, such as personal addresses and click next, moving on to the Employment tab.
Employment
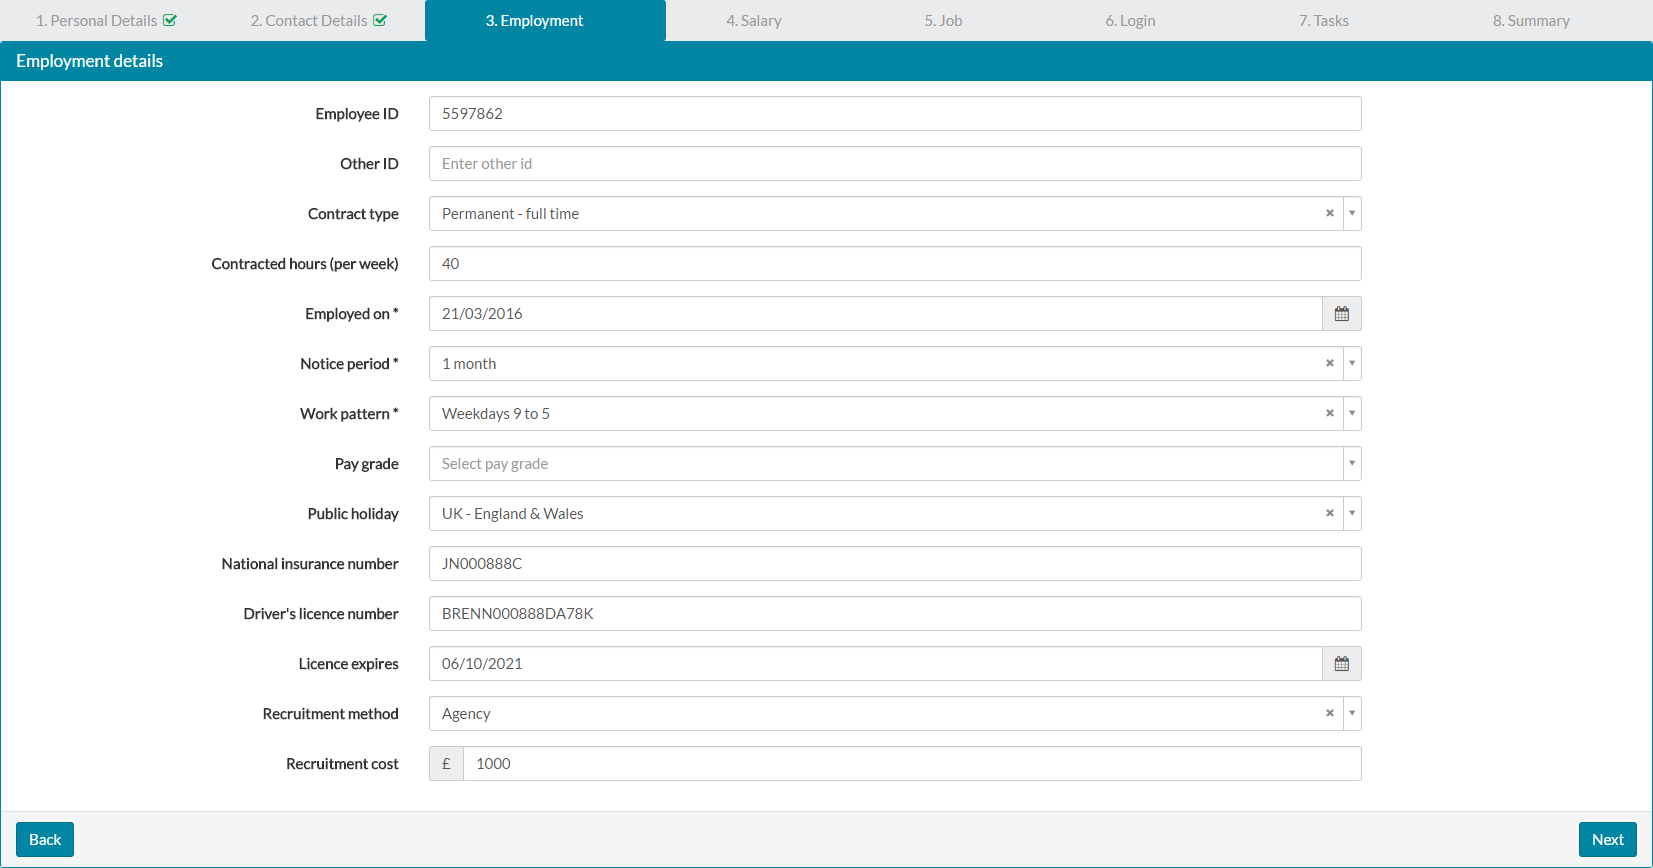
- Using the employment tab, you can enter information such as Employee ID, notice period and set work pattern and public holiday values for your new employee.
- For Employee ID, this would normally match a corresponding ID from your payroll or other systems.
- Contract type, notice period, work pattern, pay grade, public holiday and recruitment method are drop-down fields containing values set by your HR/company administrator of MyPeople, under the system lookups section.
- Enter the employee details and the employment tab will look similar to the following example.

- After entering the employment information, click next to move on to the Salary tab.
Salary
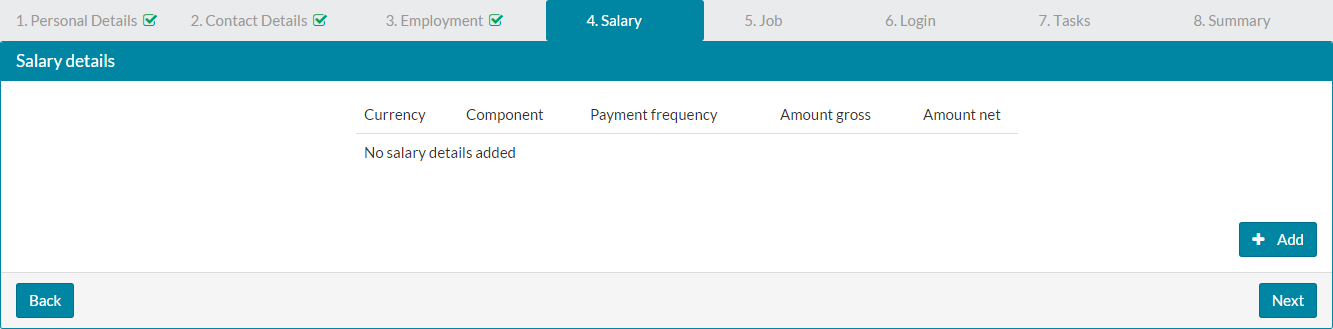
- On the salary tab, you can enter annual salary, bonus and other salary components.

- Click add to open the Salary Details form.

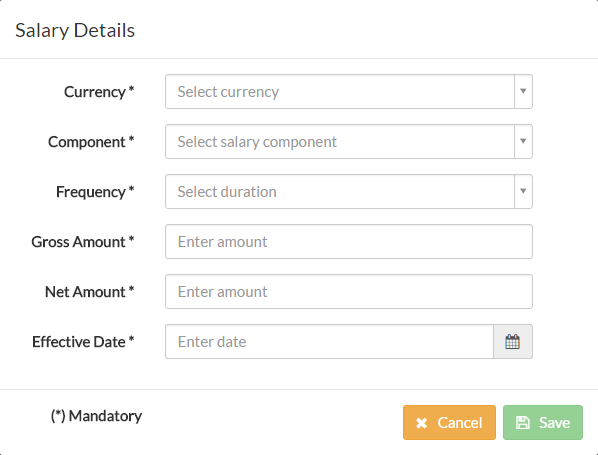
- Select a currently from the drop-down list.
- The values in the ‘Component’ drop-down field are either pre-defined system values, or ones added/amended by your HR/company administrator of MyPeople.
- Select a frequency from the drop-down list. This is frequency of when an employee is paid, either daily, weekly, monthly or annually.
- Enter both Gross and Net amounts, which correspond to the salary component selected earlier.
- Lastly, the effective date is usually the first day or employment, but could differ depending on your policies.
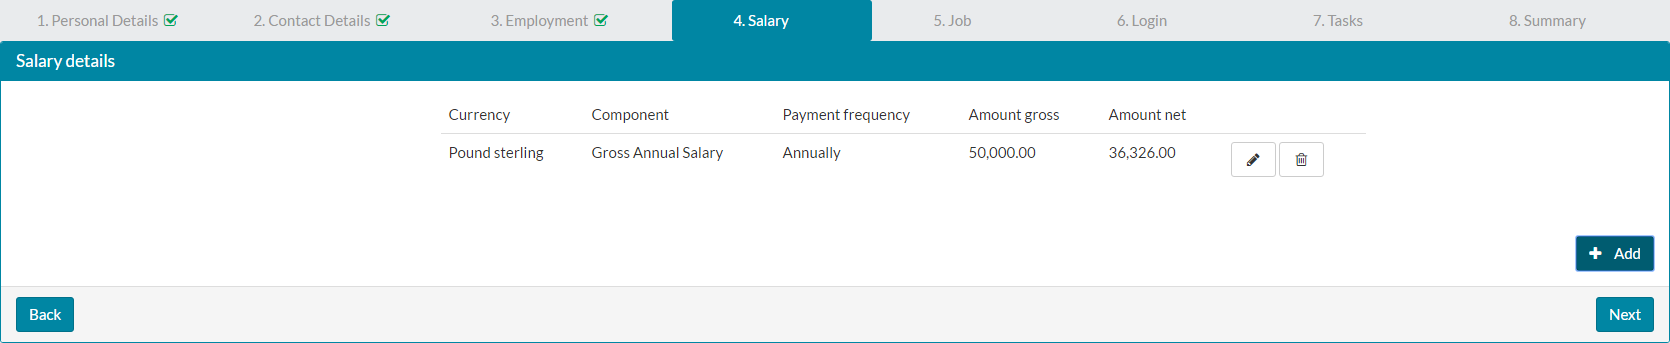
- An example of a completed Salary Details form is shown below.


- Click save and returning back to the Salary tab on the previous screen, which shows the newly added and any additional salary component details.

- Click next, to move on to the Job tab.
Job
- On the Job tab, select the Department and Job title, which are drop-down field values that are either pre-defined system values, or ones added/amended by your HR/company administrator of MyPeople.
- Select a Supervisor from the drop-down list, which will only show staff who have a manager role within MyPeople.
- Finally, enter a location. This again, is a drop-down field of values that are either pre-defined or have been added/amended by your HR/company administrator.
- A completed Job tab, will look similar to the example below.


- Click next, to move on to the Login tab.
Login
- On the Login tab, enter the new employee login for MyPeople. This is usually their business email address, similar to the address and format you use when logging in.
- You can choose whether to send the password email to this email address, which provides the new employee with a link to set their password.
- You could however leave this unchecked at this stage, then nearer the time use the ‘send password reset’ option from the user accounts menu in MyPeople. This could be due to your employee not yet having an email address or mailbox, or standard company policy that dictates that this information is only given on the first day of their employment.
- Sending a password reset email from the user accounts menu, is explained in greater detail in the related articles below.
- Select a role for the new employee, which are pre-defined and non-editable values. Please keep in mind that certain roles expose more areas of MyPeople and employee records.
- A completed Login tab, will look similar to the example below.


- Click next to move on to the Tasks tab.
Tasks
- There are several standard tasks that would normally be completed at the time of a new employee joining the business. Employment contract and employment induction, are also created as tasks for the new employee, to make them aware that these need to be completed.
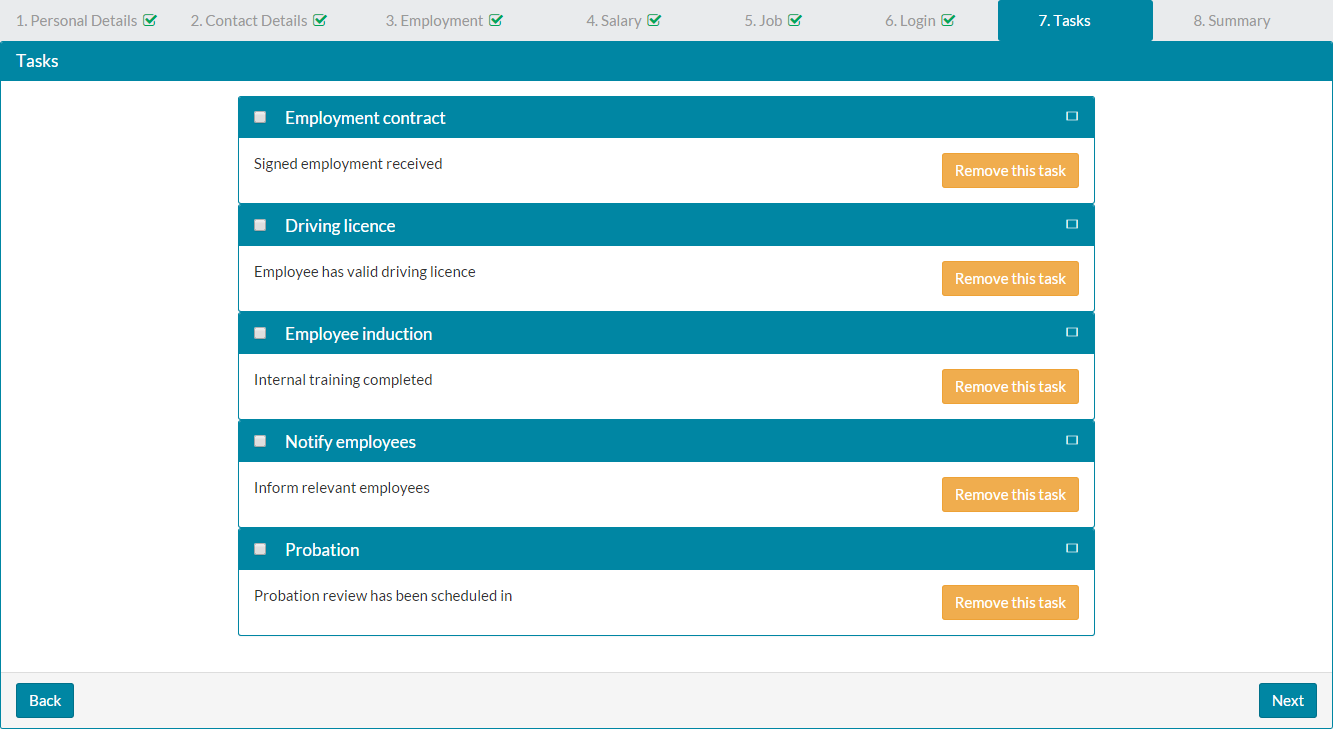

You may have already completed some tasks, in which case you can check the box to the left of the task name. - You could also remove some tasks that are not relevant, by clicking on the amber remove task button.
- Any tasks not completed at this stage, will be added to your list of tasks under My Tasks.
- Click next, to move on to the Summary tab.
Summary
- The summary tab displays brief details about the employee you've created on MyPeople.

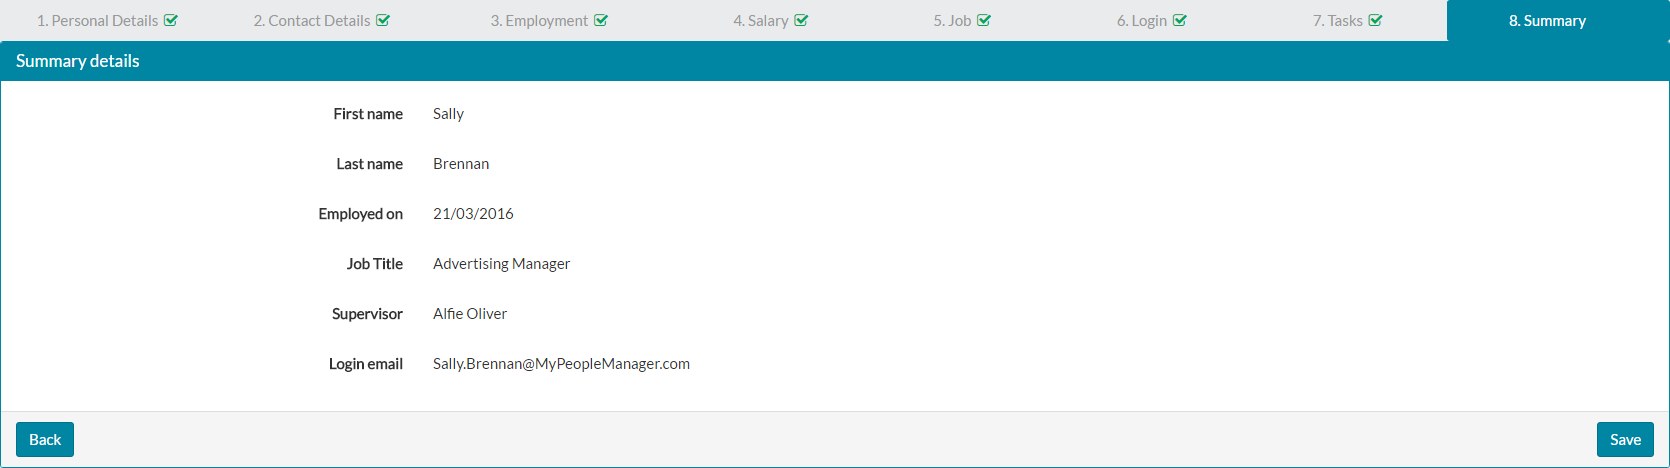
- Ensuring these details are correct, click save and your new employee will be added to MyPeople.
- After saving the new employee record to the system, you’ll see a list of next possible actions.

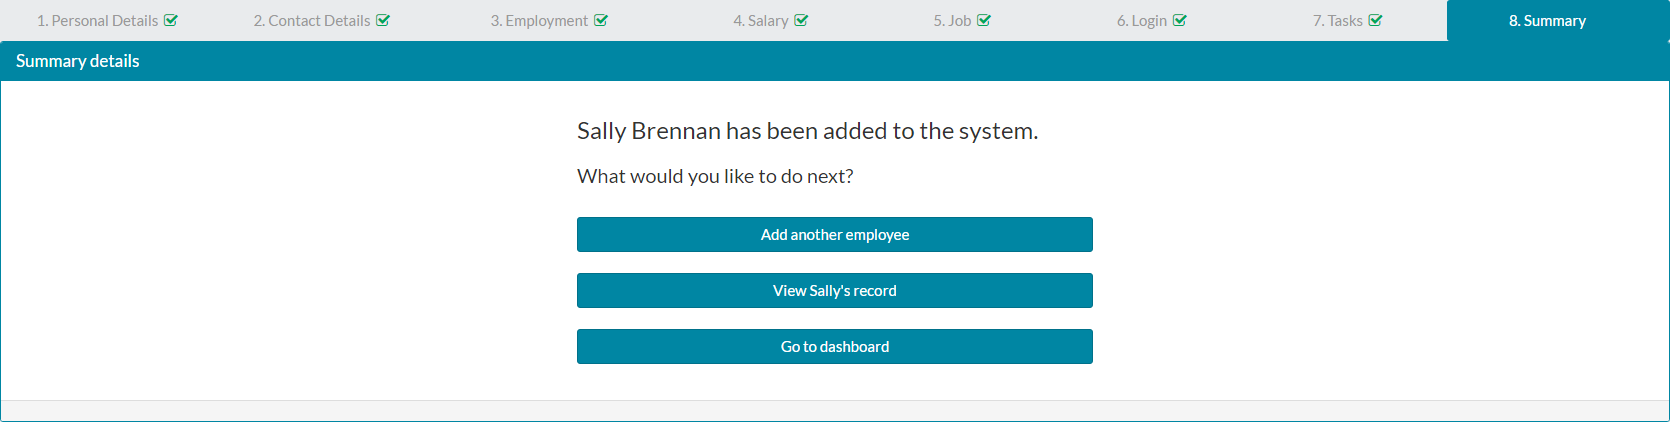
- Add another employee, view the employee record for the employee just created or return back to your own dashboard are those actions available.
Was this article helpful?
That’s Great!
Thank you for your feedback
Sorry! We couldn't be helpful
Thank you for your feedback
Feedback sent
We appreciate your effort and will try to fix the article