Applies to: Team Leaders, Line Managers & HR/Customer Administrators
There could be times when an employee is unable to book their own leave, in which case, their Team Leader / Line Manager / Supervisor can book this, or anyone with the HR or Customer administrator system roles.
When booking leave on behalf of an employee, either as their Team Leader / Line Manager / Supervisor, or as a HR or Customer administrator, there is no approval process, meaning the leave will automatically be marked as Approved or Taken, depending on when the leave was. The employee will however, receive an email notification to advise that the leave request was approved.
Recording Holiday Leave for an Employee
- To record leave on behalf of an employee, you’ll need to complete this via their employee record and the Leave tab within their record.
- Using either the employee search, or the People side menu and Employees sub-menu, find and load the employee record belonging to the employee for whom you are recording leave.
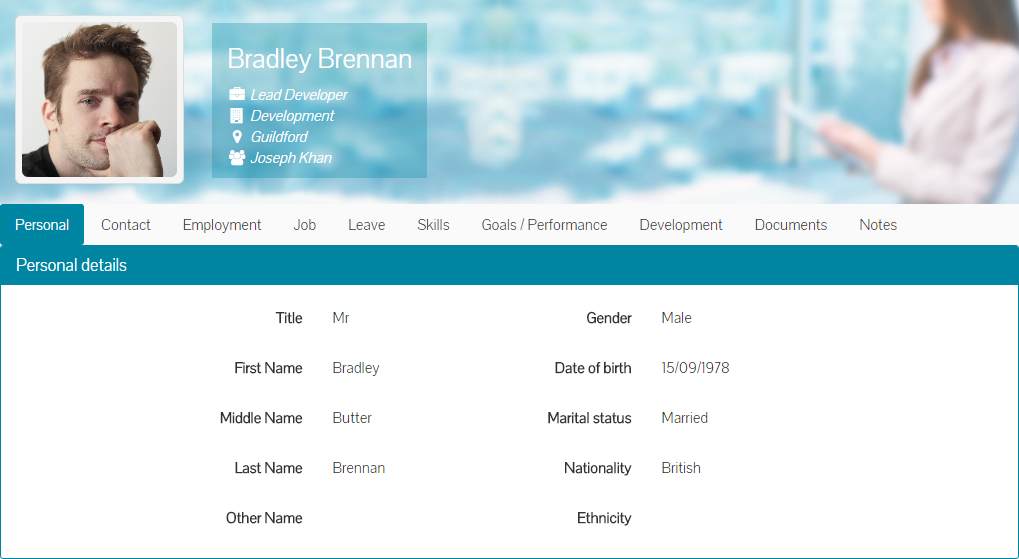
- Click on the Leave tab of the employee record.
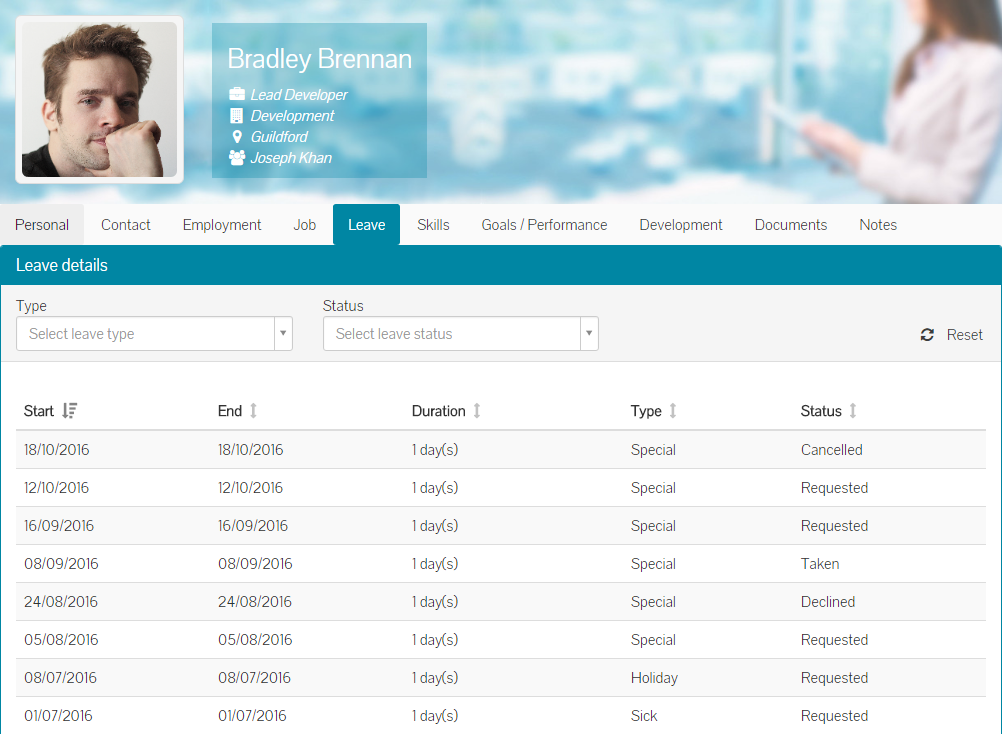
- This will load all the employees’ past, current or future leave.
- At the bottom of the Leave table, you’ll find the Book Leave dropdown menu.
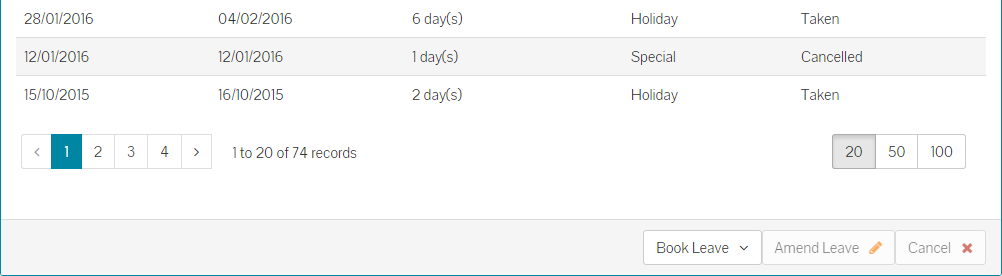
- Click on the Book Leave dropdown menu to show the additional options.

- Click Book Holiday from the Book Leave dropdown menu.
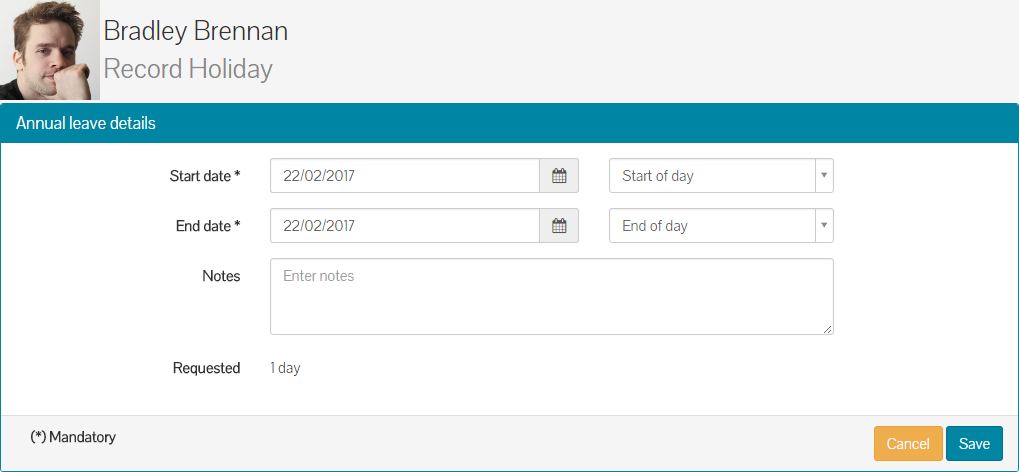
- The Record Holiday page will open showing the employee’s name and photo, confirming that you are booking leave for the correct employee.

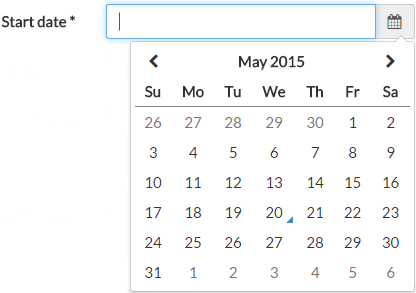
- Enter the start and end dates of the leave, either manually in the DD/MM/YYYY format or by selecting it from the calendar, by first clicking on the calendar icon shown below.

- After clicking the calendar icon, you can select the dates from the calendar.
- There are two drop-down fields labelled ‘Start of day’ and ‘End of day’, whereby you can select the start and end times of the leave. The default values are ‘Start of day’ and ‘End of day’, which is a full working day.
- If however, you needed to book half a day’s leave, then you could use the drop-down menus to select one of the following combinations:
- Start of day and Midday – half a day’s leave (AM)
- Midday and End of day – half a day’s leave (PM)
- You could however, be recording leave from midday on one day, to midday on another day. In this scenario, both drop-down menus might both state Midday.
- There is a ‘Notes’ section, where you can type information about the leave and why you are recording it on behalf of the employee, but this field is not required.
- Ensuring you have entered valid dates and times, the number of days requested will calculate the number of days you are about to record for the employee.
- A completed holiday request, will look similar to the example below.
- Click save and the leave booking will be record for the selected employee and shown in their table of past, current or future leave.

- The leave request will already be marked as Approved; therefore, no notification or approval process will need to be completed.
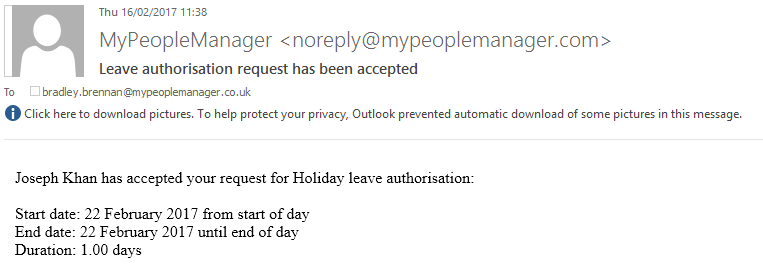
- The selected employee will receive an email notification like the example below, to make them aware that the leave was recorded.
Was this article helpful?
That’s Great!
Thank you for your feedback
Sorry! We couldn't be helpful
Thank you for your feedback
Feedback sent
We appreciate your effort and will try to fix the article